On this article, I focus on how one can high-quality(visible massive language fashions, usually known as vLLMs) like Qwen 2.5 VL 7B. I’ll introduce you to a dataset of handwritten digits, which the bottom model of Qwen 2.5 VL struggles with. We are going to then examine the dataset, annotate it, and use it to create a fine-tuned Qwen 2.5 VL, specialised in extracting hand-written textual content.
Overview
The principle objective of this text is to fine-tune a VLM on a dataset, an necessary machine-learning method in in the present day’s world, the place language fashions revolutionize the best way information scientists and ML engineers work and obtain. I can be discussing the next subjects:
- Motivation and Purpose: Why use VLMs for textual content extraction
- Benefits of VLMs
- The dataset
- Annotation and fine-tuning
- SFT technical particulars
- Outcomes and plots
Word: This text is written as a part of the work completed at Findable. We don’t revenue financially from this work. It’s completed to focus on the technical capabilities of contemporary vision-language fashions and digitize and share a priceless handwritten phenology dataset, which can have a big impression on local weather analysis. Moreover, the subject of this text was lined in a presentation in the course of the Knowledge & Draft occasion by Netlight.
You’ll be able to view all of the code used for this text in our GitHub repository, and all information is on the market on HuggingFace. In the event you’re particularly within the extracted phenology information from Norway, together with geographical coordinates equivalent to the information, the knowledge is immediately out there on this Excel sheet.
Motivation and Purpose
The objective of this text is to point out you how one can fine-tune a VLM reminiscent of Qwen for optimized efficiency on a selected job. The duty we’re engaged on right here is extracting handwritten textual content from a collection of photos. The work on this article is predicated on a Norwegian phenology dataset, which you’ll learn extra about in the README on this GitHub repository. The principle level is that the knowledge contained in these photos is extremely priceless and may, for instance, be used to conduct local weather analysis. There may be additionally definitive scientific curiosity on this subject, for instance, this text on analysing long-term modifications in when crops flower, or the Japanese Pennsylvania Phenology Challenge.
Word that the information extracted is offered in good religion, and I don’t make any claims as to what the information implies. The principle objective of this text is to point out you easy methods to extract this information and current you with the extracted information, for use for scientific analysis.

The consequence mannequin I make on this article can be utilized to extract the textual content from all photos. This information can then be transformed to tables, and you may plot the knowledge as you see within the picture under:

If you’re solely serious about viewing the information extracted on this examine, you possibly can view it in this parquet file.
Why do we have to use VLMs
When wanting on the photos, you might assume we should always apply conventional OCR to this drawback. OCR is the science of extracting textual content from photos, and in earlier years, it has been dominated by engines like Tesseract, DocTR, and EasyOCR.
Nonetheless, these fashions are sometimes outperformed by the trendy massive language fashions, notably those incorporating imaginative and prescient (sometimes known as VLMs or VLLMs)—the picture under highlights why you wish to use a VLM as an alternative of conventional OCR engines. The primary column exhibits instance photos from our dataset, and the 2 different columns evaluate EasyOCR vs the fine-tuned Qwen mannequin we are going to prepare on this article.

This highlights the principle purpose to make use of a VLM over a standard OCR engine, to extract textual content from photos: VLMs usually outperform conventional OCR engines when extracting textual content from photos.
Benefits of VLMs
There are a number of benefits to utilizing VLMs when extracting textual content from photos. Within the final part, you noticed how the output high quality from the VLM exceeds the output high quality of a standard OCR engine. One other benefit is that you may present directions to VLMs on the way you need it to behave, which conventional OCR engines can not present.
The 2 principal benefits of VLMs are thus:
- VLMs excel at OCR (notably handwriting)
- You’ll be able to present directions
VLMs are good at OCR as a result of it’s a part of the coaching course of for these fashions. That is, for instance, talked about in Qwen 2.5 VL Technical report part 2.2.1 Pre-Coaching Knowledge, the place they checklist an OCR dataset as a part of their pre-training information.
Handwriting
Extracting handwritten textual content has been notoriously troublesome up to now and continues to be a problem in the present day. The explanation for that is that handwriting is non-standardized.
With non-standardized, I discuss with the truth that the characters will look vastly completely different from individual to individual. For example of a standardized character, in case you write a personality on a pc, it’s going to constantly look very comparable throughout completely different computer systems and other people writing it. As an illustration, the pc character “a” seems to be very comparable regardless of which pc it’s written on. This makes it easier for an OCR engine to select up the character, for the reason that characters it extracts from photos, almost definitely, look fairly much like the characters it encountered in its coaching set.
Handwritten textual content, nevertheless, is the alternative. Handwriting varies extensively from individual to individual, which is why you typically battle with studying different folks’s handwriting. OCR engines even have this actual drawback. If characters range extensively, there’s a decrease likelihood that it has encountered a particular character variation in its coaching set, thus making extracting the proper character from a picture tougher.
You’ll be able to, for instance, take a look at the picture under. Think about solely wanting on the ones within the picture (so masks over the 7). Trying on the picture now, the “1” seems to be fairly much like a “7”. You might be, in fact, in a position to separate the 2 characters as a result of you possibly can see them in context, and assume critically that if a seven seems to be prefer it does (with a horizontal line), the primary two characters within the picture have to be ones.
Conventional OCR engines, nevertheless, don’t have this potential. They don’t take a look at all the picture, assume critically about one character’s look, and use that to find out different characters. They need to merely guess which character it’s when wanting on the remoted digit.

The best way to separate the digit “1” from “7”, ties properly into the subsequent part, about offering directions to the VLMs, when extracting textual content.
I might additionally like so as to add that some OCR engines, reminiscent of TrOCR, are made to extract handwritten textual content. From expertise, nevertheless, such fashions should not comparable in efficiency to state-of-the-art VLMs reminiscent of Qwen 2.5 VL.
Offering directions
One other important benefit of utilizing VLMs for extracting textual content is that you may present directions to the mannequin. That is naturally inconceivable with conventional OCR engines since they extract all of the textual content within the picture. They will solely enter a picture and never separate textual content directions for extracting the textual content from the picture. After we wish to extract textual content utilizing Qwen 2.5 VL, we offer a system immediate, such because the one under.
SYSTEM_PROMPT = """
Under is an instruction that describes a job, write a response that appropriately completes the request.

You might be an knowledgeable at studying handwritten desk entries.  I gives you a snippet of a desk and you'll
learn the textual content within the snippet and return the textual content as a string.

The texts can include the next:
1) A quantity solely, the quantity can have from 1 to three digits.
2) A quantity surrounded by extraordinary parenthesis.
3) A quantity surrounded by sqaure brackets.
5) The letter 'e', 's' or 'okay'
6) The % signal '%'
7) No textual content in any respect (clean picture).

Directions:

**Basic Guidelines**:
    - Return the textual content as a string.
    - If the snippet accommodates no textual content, return: "unknown".
    - To be able to separate the digit 1 from the digit 7, know that the digit 7 all the time could have a horizontal stroke showing in the course of the digit.
      If there is no such thing as a such horizontal stroke, the digit is a 1 even when it'd seem like a 7.
    - Beware that the textual content will usually be surrounded by a black border, don't confuse this with the textual content.  Particularly
      it's straightforward to confuse the digit 1 with elements of the border. Borders ought to be ignored.
    - Ignore something OUTSIDE the border.
    - Don't use any code formatting, backticks, or markdown in your response. Simply output the uncooked textual content.
    - Reply **ONLY** with the string. Don't present explanations or reasoning.
"""
The system immediate units the define for the way Qwen ought to extract the textual content, which supplies Qwen a serious benefit over conventional OCR engines.
There are primarily two factors that give it a bonus:
- We are able to inform Qwen which characters to count on within the picture
- We are able to inform Qwen what characters seem like (notably necessary for handwritten textual content.
You’ll be able to see level one addressed within the factors 1) -> 7), the place we inform it that it might solely see 1–3 digits, which digits and letters it might see, and so forth. This can be a important benefit, since Qwen is conscious that if it detects characters out of this vary, it’s almost definitely misinterpreting the picture, or a selected problem. It may well higher predict which character it thinks is within the picture.
The second level is especially related for the issue I discussed earlier of separating “1” from “7,” which look fairly comparable. Fortunately for us, the writer of this dataset was per how he wrote 1s and 7s. The 1s have been all the time written diagonally, and 7s all the time included the horizontal stroke, which clearly separates the “7” from a “1,” a minimum of from a human perspective of wanting on the picture.
Nonetheless, offering such detailed prompts and specs to the mannequin is just potential as soon as you actually perceive the dataset you’re engaged on and its challenges. That is why you all the time should spend time manually inspecting the information when engaged on a machine-learning drawback reminiscent of this. Within the subsequent part, I’ll focus on the dataset we’re engaged on.
The dataset
I begin this part with a quote from Greg Brockman (President of OpenAI as of writing this text), highlighting an necessary level. In his tweet, he refers to the truth that information annotation and inspection should not prestigious work, however nonetheless, it’s one of the crucial necessary duties you might be spending time on when engaged on a machine-learning challenge.
At Findable, I began as a knowledge annotator and proceeded to handle the labeling crew at Findable earlier than I now work as a knowledge scientist. The work with annotation highlighted the significance of manually inspecting and understanding the information you’re engaged on, and taught me easy methods to do it successfully. Greg Brockman is referring to the truth that this work isn’t prestigious, which is usually appropriate, since information inspection and annotation might be monotonous. Nonetheless, you must all the time spend appreciable time inspecting your dataset when engaged on a machine-learning drawback. This time will give you insights that you may, for instance, use to supply the detailed system immediate I highlighted within the final part.
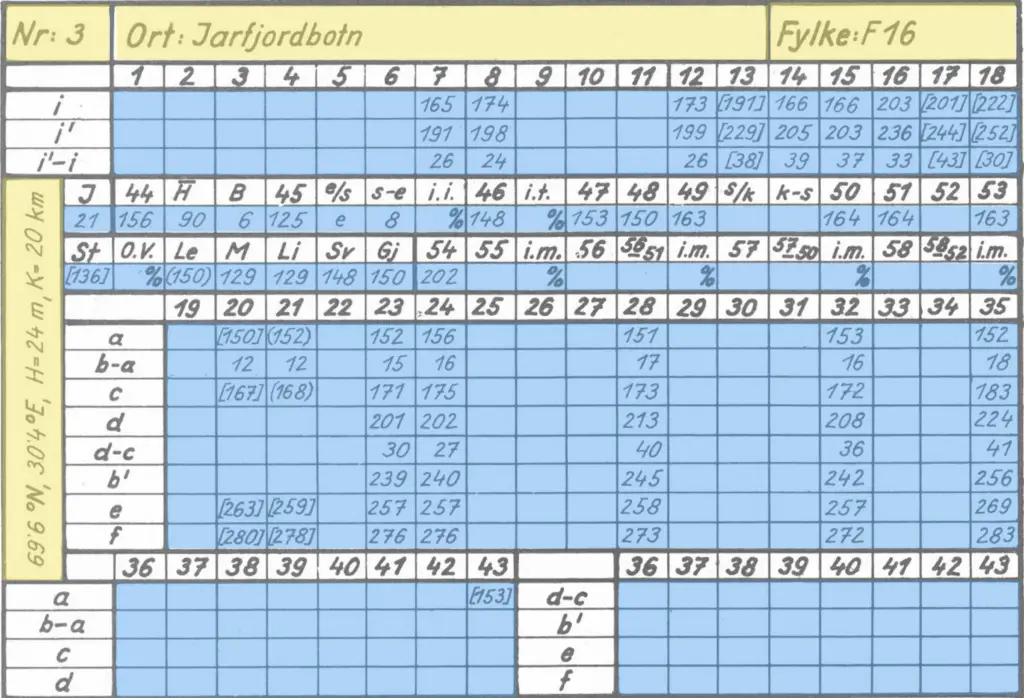
The dataset we’re engaged on consists of round 82000 photos, reminiscent of those you see under. The cells range in width from 81 to 93 pixels and in top from 48 to 57 pixels, which means we’re engaged on very small photos.

When beginning this challenge, I first frolicked wanting on the completely different photos to know the variations within the dataset. I, for instance, discover:
- The “1”s look much like the “7”s
- There may be some faint textual content in a number of the photos (for instance, the “8” within the backside left picture above, and the “6” within the backside proper picture
- From a human perspective, all the photographs are very readable, so we should always be capable to extract all of the textual content accurately
I then proceed through the use of the bottom model of Qwen 2.5 VL 7B to foretell a number of the photos and see which areas the mannequin struggles with. I instantly observed that the mannequin (unsurprisingly) had issues separating “1”s from “7”s.
After this means of first manually inspecting the information, then predicting a bit with the mannequin to see the place it struggles, I be aware down the next information challenges:
- “1” and “7” look comparable
- Dots within the background on some photos
- Cell borders might be misinterpreted as characters
- Parentheses and brackets can typically be confused
- The textual content is faint in some photos
We’ve to resolve these challenges when fine-tuning the mannequin to extract the textual content from the photographs, which I focus on within the subsequent part.
Annotation and fine-tuning
After correctly inspecting your dataset, it’s time to work on annotation and fine-tuning. Annotation is the method of setting labels to every picture, and fine-tuning is utilizing these labels to enhance the standard of your mannequin.
The principal objective when doing the annotation is to create a dataset effectively. This implies rapidly producing lots of labels and making certain the standard of the labels is excessive. To realize this objective of quickly making a high-quality dataset, I divided the method into three principal steps:
- Predict
- Overview & appropriate mannequin errors
- Retrain
You need to be aware that this course of works nicely when you may have a mannequin already fairly good at performing the duty. On this drawback, for instance, Qwen is already fairly good at extracting the textual content from the photographs, and solely makes errors in 5–10% of the instances. When you have a totally new job for the mannequin, this course of is not going to work as nicely.

Step 1: Predict
Step one is to foretell (extract the textual content) from a couple of hundred photos utilizing the bottom mannequin. The precise variety of photos you expect on does probably not matter, however you must attempt to strike a stability between gathering sufficient labels so a coaching run will enhance the mannequin sufficient (step 3) and making an allowance for the overhead required to coach a mannequin.
Step 2: Overview & appropriate mannequin errors
After you may have predicted on a couple of hundred samples, it’s time to assessment and proper the mannequin errors. You need to arrange your surroundings to simply show the photographs and labels and repair the errors. Within the picture under, you possibly can see my setup for reviewing and correcting errors. On the left facet, I’ve a Jupyter pocket book the place I can run the cell to show the next 5 samples and the corresponding line to which the label belongs. On the proper facet, all my labels are listed on the corresponding strains. To assessment and proper errors, I run the Jupyter pocket book cell, ensure that the labels on the proper match the photographs on the left, after which rerun the cell to get the next 5 photos. I repeat this course of till I’ve seemed by all of the samples.

Step 3: Retrain:
Now that you’ve got a couple of hundred appropriate samples, it’s time to prepare the mannequin. In my case, I take Qwen 2.5 VL 7B and tune it to my present set of labels. I fine-tune utilizing the Unsloth package deal, which offers this pocket book on fine-tuning Qwen (the pocket book is for Qwen 2 VL, however all of the code is identical, besides altering the naming, as you see within the code under). You’ll be able to try the subsequent part to be taught extra particulars in regards to the fine-tuning course of.
The coaching creates a fine-tuned model of the mannequin, and I am going again to step 1 to foretell on a couple of hundred new samples. I repeat this cycle of predicting, correcting, and coaching till I discover mannequin efficiency converges.
# that is the unique code within the pocket book
mannequin, tokenizer = FastVisionModel.from_pretrained(
    "unsloth/Qwen2-VL-7B-Instruct",
    load_in_4bit = False, # that is initially set to True, however you probably have the processing energy, I like to recommend setting it to False
    use_gradient_checkpointing = "unsloth",
)

# to coach Qwen 2.5 VL (as an alternative of Qwen 2 VL), be sure you use this as an alternative:
mannequin, tokenizer = FastVisionModel.from_pretrained(
    "unsloth/Qwen2.5-VL-7B-Instruct",
    load_in_4bit = False,
    use_gradient_checkpointing = "unsloth",
)
To find out how nicely my mannequin is performing, I additionally create a check set on which I check every fine-tuned mannequin. I by no means prepare on this check set to make sure unbiased outcomes. This check set is how I can decide whether or not the mannequin’s efficiency is converging.
SFT technical particulars
SFT stands for supervised fine-tuning, which is the method of updating the mannequin’s weights to carry out higher on the dataset we offer. The issue we’re engaged on right here is sort of attention-grabbing, as the bottom Qwen 2.5 VL mannequin is already fairly good at OCR. This differs from many different duties we apply VLMs to at Findable, the place we sometimes educate the VLM a totally new job with which it primarily has no prior expertise.
When fine-tuning a VLM reminiscent of Qwen on a brand new job, mannequin efficiency quickly will increase when you begin coaching it. Nonetheless, the duty we’re engaged on right here is sort of completely different, since we solely wish to nudge Qwen to be a little bit bit higher at studying the handwriting for our explicit photos. As I discussed, the mannequin’s efficiency is round 90–95 % correct (relying on the precise photos we check on), on this dataset.
This requirement of solely nudging the mannequin makes the mannequin tremendous delicate to the tuning course of parameters. To make sure we nudge the mannequin correctly, we do the next
- Set a low studying price, to solely barely replace the weights
- Set a low LoRA rank to solely replace a small set of the mannequin weights
- Guarantee all labels are appropriate (the mannequin is tremendous delicate to just some annotation errors)
- Stability the dataset (there are lots of clean photos, we filter out a few of them)
- Tune all layers of the VLM
- Carry out a hyperparameter search
I’ll add some extra notes on a number of the factors:
Label correctness
Label correctness is of utmost significance. Only a few labeling errors can have a detrimental impact on mannequin efficiency. For example, once I was engaged on fine-tuning my mannequin, I observed the mannequin began complicated parentheses “( )” with brackets “[ ]”. That is, in fact, a big error, so I began wanting into why this occurred. My first instinct was that this was as a result of points with a few of my labels (i.e, some photos that have been in truth parentheses, had obtained a label with brackets). I began wanting into my labels and observed this error in round 0.5% of them.
This helped me make an attention-grabbing commentary, nevertheless. I had a set of round 1000 labels. 99.5% of the labels have been appropriate, whereas 0.5% (5 labels!) have been incorrect. Nonetheless, after fine-tuning my mannequin, it really carried out worse on the check set. This highlights that just some incorrect labels can damage your mannequin’s efficiency.

The explanation so few errors can have such a big impression is that the mannequin blindly trusts the labels you give it. The mannequin doesn’t take a look at the picture and assume Hmmm, why is that this a bracket when the picture has a parenthesis? (such as you may do). The mannequin blindly trusts the labels and accepts it as a indisputable fact that this picture (which is a parenthesis) accommodates a bracket. This actually degrades mannequin efficiency, as you’re giving incorrect data, which it now makes use of to carry out future predictions.
Knowledge balancing
One other element of the fine-tuning is that I stability out the dataset to restrict the variety of clean photos. Round 70% of the cells include clean photos, and I wish to keep away from spending an excessive amount of fine-tuning on these photos (the mannequin already manages to disregard these cells rather well). Thus, I be sure that a most of 30% of the information we fine-tune accommodates clean photos.
Choosing layers to tune
The picture under exhibits the overall structure of a VLM:

A consideration to make when fine-tuning VLMs is which layers you fine-tune. Ideally, you wish to tune all of the layers (marked in inexperienced within the picture under), which I additionally did when engaged on this drawback. Nonetheless, typically you’ll have compute constraints, which makes tuning all layers troublesome, and also you won’t must tune all layers. An instance of this could possibly be you probably have a really image-dependent job. At Findable, for instance, we classify drawings from architects, civil engineers, and many others. That is naturally a really vision-dependent job, and that is an instance of a case the place you possibly can probably get away with solely tuning the imaginative and prescient layers of the mannequin (the ViT — Imaginative and prescient transformer, and the Imaginative and prescient-Language adapter, typically known as a projector).

Hyperparameter search
I additionally did a hyperparameter search to seek out the optimum set of parameters to fine-tune the mannequin. It’s price noting, nevertheless, {that a} hyperparameter search is not going to all the time be potential. Some coaching processes for giant language fashions can take a number of days, and in such situations, performing an in depth hyperparameter search isn’t possible, so you’ll have to work together with your instinct to discover a good set of parameters.
Nonetheless, for this drawback of extracting handwritten textual content, I had entry to an A100 80 GB GPU. The photographs are fairly small (lower than 100px in every path), and I’m working with the 7B mannequin. This made the coaching take 10–20 minutes, which makes an in a single day hyperparameter search possible.

Outcomes and plots
After repeating the cycle of coaching the mannequin, creating extra labels, retraining, and so forth, I’ve created a high-performing fine-tuned mannequin. Now it’s time to see the ultimate outcomes. I’ve made 4 check units, every consisting of 278 samples. I run EasyOCR, the bottom Qwen 2.5 VL 7B mannequin (Qwen base mannequin), and the fine-tuned mannequin on the information, and you may see the leads to the desk under:

Thus, the outcomes clearly present that the fine-tuning has labored as anticipated, vastly bettering mannequin efficiency.
To finish off, I might additionally prefer to share some plots you can also make with the information.

If you wish to examine the information additional, it’s all contained in this parquet file on HuggingFace.
Conclusion
On this article, I’ve launched you to a Phenology dataset, consisting of small photos with handwritten textual content. The issue I’ve addressed on this article is easy methods to extract the handwritten textual content from these photos successfully. First, we inspected the dataset to know what it seems to be like, the variance within the information, and the challenges the imaginative and prescient language mannequin faces when extracting the textual content from the photographs. I then mentioned the three-step pipeline you need to use to create a labelled dataset and fine-tune a mannequin to enhance efficiency. Lastly, I highlighted some outcomes, displaying how fine-tuning Qwen works higher than the bottom Qwen mannequin, and I additionally confirmed some plots representing the information we extracted.
The work on this article is carried out by Eivind Kjosbakken and Lars Aurdal.


