journey from 2D images to 3D fashions follows a structured path.
This path consists of distinct steps that construct upon one another to rework flat pictures into spatial info.
Understanding this pipeline is essential for anybody trying to create high-quality 3D reconstructions.
Let me clarify…
Most individuals suppose 3D reconstruction means:
- Taking random photographs round an object
- Urgent a button in costly software program
- Ready for magic to occur
- Getting excellent outcomes each time
- Skipping the basics
No thanks.
Probably the most profitable 3D Reconstruction I’ve seen are constructed on three core ideas:
- They use pipelines that work with fewer pictures however place them higher.
- They ensure that customers spend much less time processing however obtain cleaner outcomes.
- They allow troubleshooting quicker as a result of customers know precisely the place to look.
Subsequently, this hints at a pleasant lesson:
Your 3D fashions can solely be pretty much as good as your understanding of how they’re created.
Taking a look at this from a scientific perspective is admittedly key.
Allow us to dive proper into it!
🦊 If you’re new to my (3D) writing world, welcome! We’re happening an thrilling journey that may help you grasp a necessary 3D Python ability.
As soon as the scene is laid out, we embark on the Python journey. Every little thing is offered, included sources on the finish. You will notice Ideas (🦚Notes and 🌱Rising) that will help you get probably the most out of this text. Due to the 3D Geodata Academy for supporting the endeavor. This text is impressed by a small part of Module 1 of the 3D Reconstructor OS Course.
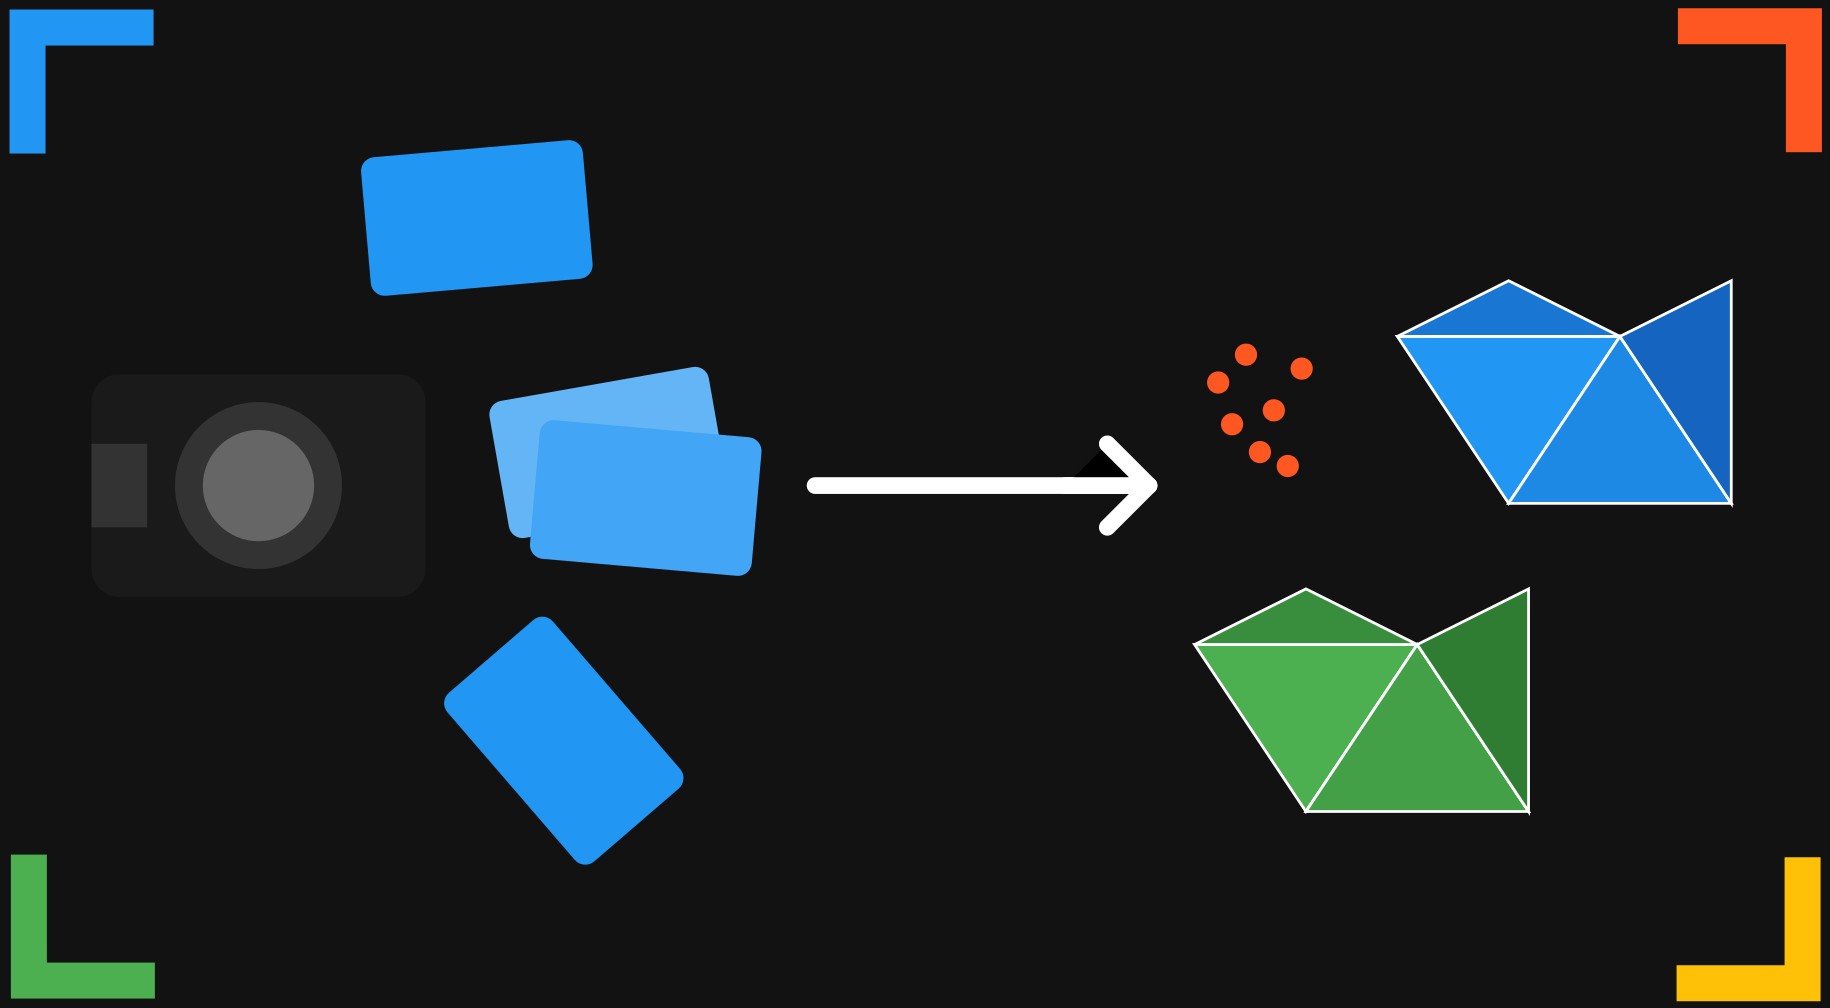
The Full 3D Reconstruction Workflow
Let me spotlight the 3D Reconstruction pipeline with Photogrammetry. The method follows a logical sequence of steps, as illustrated under.

What’s essential to notice, is that every step builds upon the earlier one. Subsequently, the standard of every stage straight impacts the ultimate end result, which is essential to take note of!
🦊 Understanding the complete course of is essential for troubleshooting workflows attributable to its sequential nature.
With that in thoughts, let’s element every step, specializing in each the idea and sensible implementation.
Pure Characteristic Extraction: Discovering the Distinctive Factors
Pure characteristic extraction is the inspiration of the photogrammetry course of. It identifies distinctive factors in pictures that may be reliably situated throughout a number of images.

These factors function anchors that tie completely different views collectively.
🌱 When working with low-texture objects, think about including non permanent markers or texture patterns to enhance characteristic extraction outcomes.
Frequent characteristic extraction algorithms embrace:
| Algorithm | Strengths | Weaknesses | Greatest For |
|---|---|---|---|
| SIFT | Scale and rotation invariant | Computationally costly | Excessive-quality, general-purpose reconstruction |
| SURF | Quicker than SIFT | Much less correct than SIFT | Fast prototyping |
| ORB | Very quick, no patent restrictions | Much less sturdy to viewpoint adjustments | Actual-time purposes |
Let’s implement a easy characteristic extraction utilizing OpenCV:
#%% SECTION 1: Pure Characteristic Extraction
import cv2
import numpy as np
import matplotlib.pyplot as plt

def extract_features(image_path, feature_method='sift', max_features=2000):
    """
    Extract options from a picture utilizing completely different strategies.
    """

    # Learn the picture in coloration and convert to grayscale
    img = cv2.imread(image_path)
    if img is None:
        elevate ValueError(f"Couldn't learn picture at {image_path}")

    grey = cv2.cvtColor(img, cv2.COLOR_BGR2GRAY)

    # Initialize characteristic detector primarily based on technique
    if feature_method.decrease() == 'sift':
        detector = cv2.SIFT_create(nfeatures=max_features)
    elif feature_method.decrease() == 'surf':
        # Word: SURF is patented and will not be out there in all OpenCV distributions
        detector = cv2.xfeatures2d.SURF_create(400)  # Regulate threshold as wanted
    elif feature_method.decrease() == 'orb':
        detector = cv2.ORB_create(nfeatures=max_features)
    else:
        elevate ValueError(f"Unsupported characteristic technique: {feature_method}")

    # Detect and compute keypoints and descriptors
    keypoints, descriptors = detector.detectAndCompute(grey, None)

    # Create visualization
    img_with_features = cv2.drawKeypoints(
        img, keypoints, None,
        flags=cv2.DRAW_MATCHES_FLAGS_DRAW_RICH_KEYPOINTS
    )

    print(f"Extracted {len(keypoints)} {feature_method.higher()} options")

    return keypoints, descriptors, img_with_features

image_path = "sample_image.jpg"  # Exchange along with your picture path

# Extract options with completely different strategies
kp_sift, desc_sift, vis_sift = extract_features(image_path, 'sift')
kp_orb, desc_orb, vis_orb = extract_features(image_path, 'orb')
What I do right here is run via a picture, and hunt for distinctive patterns that stand out from their environment.
These patterns create mathematical “signatures” referred to as descriptors that stay recognizable even when considered from completely different angles or distances.
Consider them as distinctive fingerprints that may be matched throughout a number of images.
The visualization step reveals precisely what the algorithm finds essential in your picture.
# Show outcomes
plt.determine(figsize=(12, 6))

plt.subplot(1, 2, 1)
plt.title(f'SIFT Options ({len(kp_sift)})')
plt.imshow(cv2.cvtColor(vis_sift, cv2.COLOR_BGR2RGB))
plt.axis('off')

plt.subplot(1, 2, 2)
plt.title(f'ORB Options ({len(kp_orb)})')
plt.imshow(cv2.cvtColor(vis_orb, cv2.COLOR_BGR2RGB))
plt.axis('off')

plt.tight_layout()
plt.present()
Discover how corners, edges, and textured areas appeal to extra keypoints, whereas easy or uniform areas stay largely ignored.

This visible suggestions is invaluable for understanding why some objects reconstruct higher than others.
🦥 Geeky Word: The max_features parameter is vital. Setting it too excessive can dramatically sluggish processing and seize noise, whereas setting it too low would possibly miss essential particulars. For many objects, 2000-5000 options present an excellent stability, however I’ll push it to 10,000+ for extremely detailed architectural reconstructions.
Characteristic Matching: Connecting Photographs Collectively
As soon as options are extracted, the subsequent step is to search out correspondences between pictures. This course of identifies which factors in numerous pictures signify the identical bodily level in the actual world. Characteristic matching creates the connections wanted to find out digicam positions.

I’ve seen numerous makes an attempt fail as a result of the algorithm couldn’t reliably join the identical factors throughout completely different pictures.
The ratio check is the silent hero that weeds out ambiguous matches earlier than they poison your reconstruction.
#%% SECTION 2: Characteristic Matching
import cv2
import numpy as np
import matplotlib.pyplot as plt

def match_features(descriptors1, descriptors2, technique='flann', ratio_thresh=0.75):
    """
    Match options between two pictures utilizing completely different strategies.
    """

    # Convert descriptors to applicable kind if wanted
    if descriptors1 is None or descriptors2 is None:
        return []

    if technique.decrease() == 'flann':
        # FLANN parameters
        if descriptors1.dtype != np.float32:
            descriptors1 = np.float32(descriptors1)
        if descriptors2.dtype != np.float32:
            descriptors2 = np.float32(descriptors2)

        FLANN_INDEX_KDTREE = 1
        index_params = dict(algorithm=FLANN_INDEX_KDTREE, timber=5)
        search_params = dict(checks=50)  # Greater values = extra correct however slower

        flann = cv2.FlannBasedMatcher(index_params, search_params)
        matches = flann.knnMatch(descriptors1, descriptors2, ok=2)
    else:  # Brute Power
        # For ORB descriptors
        if descriptors1.dtype == np.uint8:
            bf = cv2.BFMatcher(cv2.NORM_HAMMING, crossCheck=False)
        else:  # For SIFT and SURF descriptors
            bf = cv2.BFMatcher(cv2.NORM_L2, crossCheck=False)

        matches = bf.knnMatch(descriptors1, descriptors2, ok=2)

    # Apply Lowe's ratio check
    good_matches = []
    for match in matches:
        if len(match) == 2:  # Generally fewer than 2 matches are returned
            m, n = match
            if m.distance < ratio_thresh * n.distance:
                good_matches.append(m)

    return good_matches

def visualize_matches(img1, kp1, img2, kp2, matches, max_display=100):
    """
    Create a visualization of characteristic matches between two pictures.
    """

    # Restrict the variety of matches to show
    matches_to_draw = matches[:min(max_display, len(matches))]

    # Create match visualization
    match_img = cv2.drawMatches(
        img1, kp1, img2, kp2, matches_to_draw, None,
        flags=cv2.DrawMatchesFlags_NOT_DRAW_SINGLE_POINTS
    )

    return match_img

# Load two pictures
img1_path = "image1.jpg"  # Exchange along with your picture paths
img2_path = "image2.jpg"

# Extract options utilizing SIFT (or your most popular technique)
kp1, desc1, _ = extract_features(img1_path, 'sift')
kp2, desc2, _ = extract_features(img2_path, 'sift')

# Match options
good_matches = match_features(desc1, desc2, technique='flann')

print(f"Discovered {len(good_matches)} good matches")
The matching course of works by evaluating characteristic descriptors between two pictures, measuring their mathematical similarity. For every characteristic within the first picture, we discover its two closest matches within the second picture and assess their relative distances.
If the closest match is considerably higher than the second-best (as managed by the ratio threshold), we think about it dependable.
# Visualize matches
img1 = cv2.imread(img1_path)
img2 = cv2.imread(img2_path)
match_visualization = visualize_matches(img1, kp1, img2, kp2, good_matches)

plt.determine(figsize=(12, 8))
plt.imshow(cv2.cvtColor(match_visualization, cv2.COLOR_BGR2RGB))
plt.title(f"Characteristic Matches: {len(good_matches)}")
plt.axis('off')
plt.tight_layout()
plt.present()
Visualizing these matches reveals the spatial relationships between your pictures.

Good matches kind a constant sample that displays the rework between viewpoints, whereas outliers seem as random connections.
This sample gives quick suggestions on picture high quality and digicam positioning—clustered, constant matches recommend good reconstruction potential.
🦥 Geeky Word: The ratio_thresh parameter (0.75) is Lowe’s authentic suggestion and works properly in most conditions. Decrease values (0.6-0.7) produce fewer however extra dependable matches, which is preferable for scenes with repetitive patterns. Greater values (0.8-0.9) yield extra matches however improve the chance of outliers contaminating your reconstruction.
Stunning, now, allow us to transfer on the important stage: the Construction from Movement node.
Construction From Movement: Putting Cameras in House
Construction from Movement (SfM) reconstructs each the 3D scene construction and digicam movement from the 2D picture correspondences. This course of determines the place every photograph was taken from and creates an preliminary sparse level cloud of the scene.
Key steps in SfM embrace:
- Estimating the elemental or important matrix between picture pairs
- Recovering digicam poses (place and orientation)
- Triangulating 3D factors from 2D correspondences
- Constructing a monitor graph to attach observations throughout a number of pictures
The important matrix encodes the geometric relationship between two digicam viewpoints, revealing how they’re positioned relative to one another in area.
This mathematical relationship is the inspiration for reconstructing each the digicam positions and the 3D construction they noticed.
#%% SECTION 3: Construction from Movement
import cv2
import numpy as np
import matplotlib.pyplot as plt
from mpl_toolkits.mplot3d import Axes3D

def estimate_pose(kp1, kp2, matches, Ok, technique=cv2.RANSAC, prob=0.999, threshold=1.0):
    """
    Estimate the relative pose between two cameras utilizing matched options.
    """

    # Extract matched factors
    pts1 = np.float32([kp1[m.queryIdx].pt for m in matches])
    pts2 = np.float32([kp2[m.trainIdx].pt for m in matches])

    # Estimate important matrix
    E, masks = cv2.findEssentialMat(pts1, pts2, Ok, technique, prob, threshold)

    # Get better pose from important matrix
    _, R, t, masks = cv2.recoverPose(E, pts1, pts2, Ok, masks=masks)

    inlier_matches = [matches[i] for i in vary(len(matches)) if masks[i] > 0]
    print(f"Estimated pose with {np.sum(masks)} inliers out of {len(matches)} matches")

    return R, t, masks, inlier_matches

def triangulate_points(kp1, kp2, matches, Ok, R1, t1, R2, t2):
    """
    Triangulate 3D factors from two views.
    """

    # Extract matched factors
    pts1 = np.float32([kp1[m.queryIdx].pt for m in matches])
    pts2 = np.float32([kp2[m.trainIdx].pt for m in matches])

    # Create projection matrices
    P1 = np.dot(Ok, np.hstack((R1, t1)))
    P2 = np.dot(Ok, np.hstack((R2, t2)))

    # Triangulate factors
    points_4d = cv2.triangulatePoints(P1, P2, pts1.T, pts2.T)

    # Convert to 3D factors
    points_3d = points_4d[:3] / points_4d[3]

    return points_3d.T

def visualize_points_and_cameras(points_3d, R1, t1, R2, t2):
    """
    Visualize 3D factors and digicam positions.
    """

    fig = plt.determine(figsize=(10, 8))
    ax = fig.add_subplot(111, projection='3d')

    # Plot factors
    ax.scatter(points_3d[:, 0], points_3d[:, 1], points_3d[:, 2], c='b', s=1)

    # Helper perform to create digicam visualization
    def plot_camera(R, t, coloration):
        # Digital camera middle
        middle = -R.T @ t
        ax.scatter(middle[0], middle[1], middle[2], c=coloration, s=100, marker='o')

        # Digital camera axes (displaying orientation)
        axes_length = 0.5  # Scale to make it seen
        for i, c in zip(vary(3), ['r', 'g', 'b']):
            axis = R.T[:, i] * axes_length
            ax.quiver(middle[0], middle[1], middle[2],
                      axis[0], axis[1], axis[2],
                      coloration=c, arrow_length_ratio=0.1)

    # Plot cameras
    plot_camera(R1, t1, 'pink')
    plot_camera(R2, t2, 'inexperienced')

    ax.set_title('3D Reconstruction: Factors and Cameras')
    ax.set_xlabel('X')
    ax.set_ylabel('Y')
    ax.set_zlabel('Z')

    # Attempt to make axes equal
    max_range = np.max([
        np.max(points_3d[:, 0]) - np.min(points_3d[:, 0]),
        np.max(points_3d[:, 1]) - np.min(points_3d[:, 1]),
        np.max(points_3d[:, 2]) - np.min(points_3d[:, 2])
    ])

    mid_x = (np.max(points_3d[:, 0]) + np.min(points_3d[:, 0])) * 0.5
    mid_y = (np.max(points_3d[:, 1]) + np.min(points_3d[:, 1])) * 0.5
    mid_z = (np.max(points_3d[:, 2]) + np.min(points_3d[:, 2])) * 0.5

    ax.set_xlim(mid_x - max_range * 0.5, mid_x + max_range * 0.5)
    ax.set_ylim(mid_y - max_range * 0.5, mid_y + max_range * 0.5)
    ax.set_zlim(mid_z - max_range * 0.5, mid_z + max_range * 0.5)

    plt.tight_layout()
    plt.present()
🦥 Geeky Word: The RANSAC threshold parameter (threshold=1.0) determines how strict we’re about geometric consistency. I’ve discovered that 0.5-1.0 works properly for managed environments, however rising to 1.5-2.0 helps with out of doors scenes the place wind would possibly trigger slight digicam actions. The likelihood parameter (prob=0.999) ensures excessive confidence however will increase computation time; 0.95 is adequate for prototyping.
The important matrix estimation makes use of matched characteristic factors and the digicam’s inner parameters to calculate the geometric relationship between pictures.

This relationship is then decomposed to extract rotation and translation info – basically figuring out the place every photograph was taken from in 3D area. The accuracy of this step straight impacts all the things that follows.
# It is a simplified instance - in follow you'd use pictures and matches
# from the earlier steps

# Instance digicam intrinsic matrix (change along with your calibrated values)
Ok = np.array([
        [1000, 0, 320],
        [0, 1000, 240],
        [0, 0, 1]
])

# For first digicam, we use identification rotation and 0 translation
R1 = np.eye(3)
t1 = np.zeros((3, 1))

# Load pictures, extract options, and match as in earlier sections
img1_path = "image1.jpg"  # Exchange along with your picture paths
img2_path = "image2.jpg"

img1 = cv2.imread(img1_path)
img2 = cv2.imread(img2_path)

kp1, desc1, _ = extract_features(img1_path, 'sift')
kp2, desc2, _ = extract_features(img2_path, 'sift')

matches = match_features(desc1, desc2, technique='flann')

# Estimate pose of second digicam relative to first
R2, t2, masks, inliers = estimate_pose(kp1, kp2, matches, Ok)

# Triangulate factors
points_3d = triangulate_points(kp1, kp2, inliers, Ok, R1, t1, R2, t2)
As soon as digicam positions are established, triangulation tasks rays from matched factors in a number of pictures to find out the place they intersect in 3D area.
# Visualize the end result
visualize_points_and_cameras(points_3d, R1, t1, R2, t2)
These intersections kind the preliminary sparse level cloud, offering the skeleton upon which dense reconstruction will later construct. The visualization exhibits each the reconstructed factors and the digicam positions, serving to you perceive the spatial relationships in your dataset.
🌱 SfM works finest with an excellent community of overlapping pictures. Intention for no less than 60% overlap between adjoining pictures for dependable reconstruction.
Bundle Adjustment: Optimizing for Accuracy
There’s an additional optimization stage that is available in inside the Construction from Movement “compute node”.
That is referred to as: Bundle adjustment.
It’s a refinement step that collectively optimizes digicam parameters and 3D level positions. What which means, is that it minimizes the reprojection error, i.e. the distinction between noticed picture factors and the projection of their corresponding 3D factors.
Does this make sense to you? Primarily, this optimization is nice because it permits to:
- improves the accuracy of the reconstruction
- right for collected drift
- Ensures international consistency of the mannequin
At this stage, this must be sufficient to get an excellent instinct of the way it works.
🌱 In bigger tasks, incremental bundle adjustment (optimizing after including every new digicam) can enhance each velocity and stability in comparison with international adjustment on the finish.
Dense Matching: Creating Detailed Reconstructions
After establishing digicam positions and sparse factors, the ultimate step is dense matching to create an in depth illustration of the scene.

Dense matching makes use of the recognized digicam parameters to match many extra factors between pictures, leading to an entire level cloud.
Frequent approaches embrace:
- Multi-View Stereo (MVS)
- Patch-based Multi-View Stereo (PMVS)
- Semi-World Matching (SGM)
Placing It All Collectively: Sensible Instruments
The theoretical pipeline is applied in a number of open-source and industrial software program packages. Every gives completely different options and capabilities:
| Instrument | Strengths | Use Case | Pricing |
|---|---|---|---|
| COLMAP | Extremely correct, customizable | Analysis, exact reconstructions | Free, open-source |
| OpenMVG | Modular, in depth documentation | Schooling, integration with customized pipelines | Free, open-source |
| Meshroom | Consumer-friendly, node-based interface | Artists, learners | Free, open-source |
| RealityCapture | Extraordinarily quick, high-quality outcomes | Skilled, large-scale tasks | Industrial |
These instruments bundle the varied pipeline steps described above right into a extra user-friendly interface, however understanding the underlying processes continues to be important for troubleshooting and optimization.
Automating the reconstruction pipeline saves numerous hours of handbook work.
The true productiveness enhance comes from scripting the complete course of end-to-end, from uncooked photographs to dense level cloud.
COLMAP’s command-line interface makes this automation potential, even for advanced reconstruction duties.
#%% SECTION 4: Full Pipeline Automation with COLMAP
import os
import subprocess
import glob
import numpy as np

def run_colmap_pipeline(image_folder, output_folder, colmap_path="colmap"):
    """
    Run the entire COLMAP pipeline from characteristic extraction to dense reconstruction.
    """

    # Create output directories if they do not exist
    sparse_folder = os.path.be a part of(output_folder, "sparse")
    dense_folder = os.path.be a part of(output_folder, "dense")
    database_path = os.path.be a part of(output_folder, "database.db")

    os.makedirs(output_folder, exist_ok=True)
    os.makedirs(sparse_folder, exist_ok=True)
    os.makedirs(dense_folder, exist_ok=True)

    # Step 1: Characteristic extraction
    print("Step 1: Characteristic extraction")
    feature_cmd = [
        colmap_path, "feature_extractor",
        "--database_path", database_path,
        "--image_path", image_folder,
        "--ImageReader.camera_model", "SIMPLE_RADIAL",
        "--ImageReader.single_camera", "1",
        "--SiftExtraction.use_gpu", "1"
    ]

    attempt:
        subprocess.run(feature_cmd, examine=True)
    besides subprocess.CalledProcessError as e:
        print(f"Characteristic extraction failed: {e}")
        return False

    # Step 2: Match options
    print("Step 2: Characteristic matching")
    match_cmd = [
        colmap_path, "exhaustive_matcher",
        "--database_path", database_path,
        "--SiftMatching.use_gpu", "1"
    ]

    attempt:
        subprocess.run(match_cmd, examine=True)
    besides subprocess.CalledProcessError as e:
        print(f"Characteristic matching failed: {e}")
        return False

    # Step 3: Sparse reconstruction (Construction from Movement)
    print("Step 3: Sparse reconstruction")
    sfm_cmd = [
        colmap_path, "mapper",
        "--database_path", database_path,
        "--image_path", image_folder,
        "--output_path", sparse_folder
    ]

    attempt:
        subprocess.run(sfm_cmd, examine=True)
    besides subprocess.CalledProcessError as e:
        print(f"Sparse reconstruction failed: {e}")
        return False

    # Discover the most important sparse mannequin
    sparse_models = glob.glob(os.path.be a part of(sparse_folder, "*/"))
    if not sparse_models:
        print("No sparse fashions discovered")
        return False

    # Kind by mannequin measurement (utilizing variety of pictures as proxy)
    largest_model = 0
    max_images = 0
    for i, model_dir in enumerate(sparse_models):
        images_txt = os.path.be a part of(model_dir, "pictures.txt")
        if os.path.exists(images_txt):
            with open(images_txt, 'r') as f:
                num_images = sum(1 for line in f if line.strip() and never line.startswith("#"))
                num_images = num_images // 2  # Every picture has 2 strains
                if num_images > max_images:
                    max_images = num_images
                    largest_model = i

    selected_model = os.path.be a part of(sparse_folder, str(largest_model))
    print(f"Chosen mannequin {largest_model} with {max_images} pictures")

    # Step 4: Picture undistortion
    print("Step 4: Picture undistortion")
    undistort_cmd = [
        colmap_path, "image_undistorter",
        "--image_path", image_folder,
        "--input_path", selected_model,
        "--output_path", dense_folder,
        "--output_type", "COLMAP"
    ]

    attempt:
        subprocess.run(undistort_cmd, examine=True)
    besides subprocess.CalledProcessError as e:
        print(f"Picture undistortion failed: {e}")
        return False

    # Step 5: Dense reconstruction (Multi-View Stereo)
    print("Step 5: Dense reconstruction")
    mvs_cmd = [
        colmap_path, "patch_match_stereo",
        "--workspace_path", dense_folder,
        "--workspace_format", "COLMAP",
        "--PatchMatchStereo.geom_consistency", "true"
    ]

    attempt:
        subprocess.run(mvs_cmd, examine=True)
    besides subprocess.CalledProcessError as e:
        print(f"Dense reconstruction failed: {e}")
        return False

    # Step 6: Stereo fusion
    print("Step 6: Stereo fusion")
    fusion_cmd = [
        colmap_path, "stereo_fusion",
        "--workspace_path", dense_folder,
        "--workspace_format", "COLMAP",
        "--input_type", "geometric",
        "--output_path", os.path.join(dense_folder, "fused.ply")
    ]

    attempt:
        subprocess.run(fusion_cmd, examine=True)
    besides subprocess.CalledProcessError as e:
        print(f"Stereo fusion failed: {e}")
        return False

    print("Pipeline accomplished efficiently!")
    return True
The script orchestrates a collection of COLMAP operations that may usually require handbook intervention at every stage. It handles the development from characteristic extraction via matching, sparse reconstruction, and at last dense reconstruction – sustaining the proper information stream between steps. This automation turns into invaluable when processing a number of datasets or when iteratively refining reconstruction parameters.
# Exchange along with your picture and output folder paths
image_folder = "path/to/pictures"
output_folder = "path/to/output"

# Path to COLMAP executable (could also be simply "colmap" if it is in your PATH)
colmap_path = "colmap"

run_colmap_pipeline(image_folder, output_folder, colmap_path)
One key side is the automated number of the most important reconstructed mannequin. In difficult datasets, COLMAP generally creates a number of disconnected reconstructions fairly than a single cohesive mannequin.
The script intelligently identifies and continues with probably the most full reconstruction, utilizing picture rely as a proxy for mannequin high quality and completeness.
🦥 Geeky Word: The –SiftExtraction.use_gpu and –SiftMatching.use_gpu flags allow GPU acceleration, rushing up processing by 5-10x. For dense reconstruction, the –PatchMatchStereo.geom_consistency true parameter considerably improves high quality by implementing consistency throughout a number of views, at the price of longer processing time.
The Energy of Understanding the Pipeline
Understanding the complete reconstruction pipeline offers you management over your 3D modeling course of. Once you encounter points, figuring out which stage may be inflicting issues permits you to goal your troubleshooting efforts successfully.

As illustrated, widespread points and their sources embrace:
- Lacking or incorrect digicam poses: Characteristic extraction and matching issues
- Incomplete reconstruction: Inadequate picture overlap
- Noisy level clouds: Poor bundle adjustment or digicam calibration
- Failed reconstruction: Problematic pictures (movement blur, poor lighting)
The flexibility to diagnose these points comes from a deep understanding of how every pipeline part works and interacts with others.
Subsequent Steps: Observe and Automation
Now that you simply perceive the pipeline, it’s time to place it into follow. Experiment with the offered code examples and take a look at automating the method on your personal datasets.
Begin with small, well-controlled scenes and progressively sort out extra advanced environments as you acquire confidence.
Do not forget that the standard of your enter pictures dramatically impacts the ultimate end result. Take time to seize high-quality images with good overlap, constant lighting, and minimal movement blur.
🌱 Take into account beginning a small private undertaking to reconstruct an object you personal. Doc your course of, together with the problems you encounter and the way you resolve them – this sensible expertise is invaluable.
If you wish to construct correct experience, think about
the 3D Reconstructor OS Course ▶️,
or 3D Information Science with Python 📕 (O’Reilly)
References and helpful sources
I compiled for you some attention-grabbing software program, instruments, and helpful algorithm prolonged documentation:
Software program and Instruments
- COLMAP – Free, open-source 3D reconstruction software program
- OpenMVG – Open A number of View Geometry library
- Meshroom – Free node-based photogrammetry software program
- RealityCapture – Industrial high-performance photogrammetry software program
- Agisoft Metashape – Industrial photogrammetry and 3D modeling software program
- OpenCV – Laptop imaginative and prescient library with characteristic detection implementations
- 3DF Zephyr – Photogrammetry software program for 3D reconstruction
- Python – Programming language preferrred for 3D reconstruction automation
Algorithms
In regards to the creator
Florent Poux, Ph.D. is a Scientific and Course Director centered on educating engineers on leveraging AI and 3D Information Science. He leads analysis groups and teaches 3D Laptop Imaginative and prescient at numerous universities. His present goal is to make sure people are accurately geared up with the information and expertise to sort out 3D challenges for impactful improvements.
Sources
- 🏆Awards: Jack Dangermond Award
- 📕Guide: 3D Information Science with Python
- 📜Analysis: 3D Sensible Level Cloud (Thesis)
- 🎓Programs: 3D Geodata Academy Catalog
- 💻Code: Florent’s Github Repository
- 💌3D Tech Digest: Weekly Publication


