PyBullet is an open-source simulation platform created by Fb that’s designed for coaching bodily brokers (equivalent to robots) in a 3D atmosphere. It gives a physics engine for each inflexible and mushy our bodies. It’s generally used for robotics, synthetic intelligence, and sport growth.
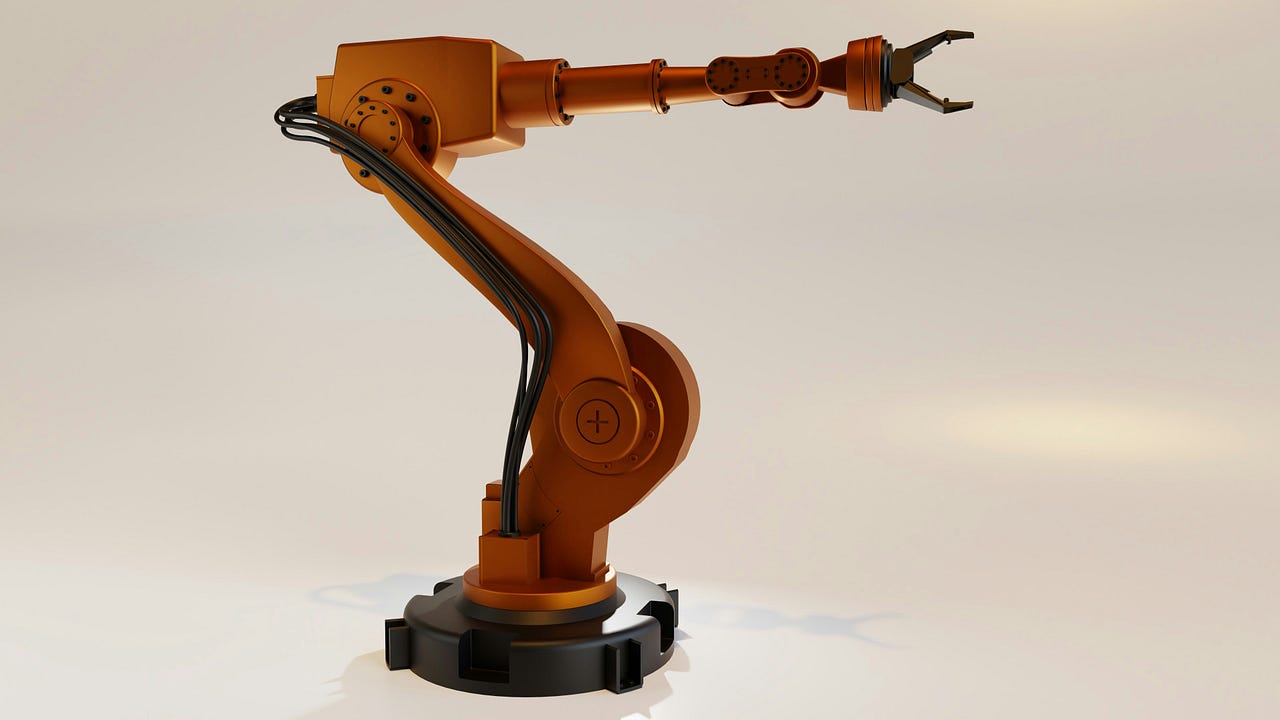
Robotic arms are highly regarded attributable to their velocity, precision, and skill to work in hazardous environments. They’re used for duties equivalent to welding, meeting, and materials dealing with, particularly in industrial settings (like manufacturing).
There are two methods for a robotic to carry out a process:
- Guide Management – requires a human to explicitly program each motion. Higher fitted to mounted duties, however struggles with uncertainty and requires tedious parameter tuning for each new state of affairs.
- Synthetic Intelligence – permits a robotic to be taught one of the best actions by means of trial and error to realize a purpose. So, it will probably adapt to altering environments by studying from rewards and penalties with no predefined plan (Reinforcement Studying).
On this article, I’m going to indicate construct a 3D atmosphere with PyBullet for manually controlling a robotic arm. I’ll current some helpful Python code that may be simply utilized in different comparable instances (simply copy, paste, run) and stroll by means of each line of code with feedback in an effort to replicate this instance.
Setup
PyBullet can simply be put in with one of many following instructions (if pip fails, conda ought to positively work):
pip set up pybullet

conda set up -c conda-forge pybullet
PyBullet comes with a set of preset URDF information (Unified Robotic Description Format), that are XML schemas describing the bodily construction of objects within the 3D atmosphere (i.e. dice, sphere, robotic).
import pybullet as p
import pybullet_data
import time

## setup
p.join(p.GUI)
p.resetSimulation()
p.setGravity(gravX=0, gravY=0, gravZ=-9.8)
p.setAdditionalSearchPath(path=pybullet_data.getDataPath())

## load URDF
airplane = p.loadURDF("airplane.urdf")

dice = p.loadURDF("dice.urdf", basePosition=[0,0,0.1], globalScaling=0.5, useFixedBase=True)

obj = p.loadURDF("cube_small.urdf", basePosition=[1,1,0.1], globalScaling=1.5)
p.changeVisualShape(objectUniqueId=obj, linkIndex=-1, rgbaColor=[1,0,0,1]) #pink

whereas p.isConnected():
    p.setRealTimeSimulation(True)
Let’s undergo the code above:
- when you possibly can hook up with the physics engine, it’s worthwhile to specify if you wish to open the graphic interface (
p.GUI) or not (p.DIRECT). - The Cartesian house has 3 dimensions: x-axis (ahead/backward), y-axis (left/proper), z-axis (up/down).
- It’s widespread apply to set the gravity to
(x=0, y=0, z=-9.8)simulating Earth’s gravity, however one can change it based mostly on the target of the simulation. - Often, it’s worthwhile to import a airplane to create a floor, in any other case objects would simply fall indefinitely. If you need an object to be mounted to the ground, then set
useFixedBase=True(it’s False by default). I imported the objects withbasePosition=[0,0,0.1]that means that they’re 10cm above the bottom. - The simulation could be rendered in real-time with
p.setRealTimeSimulation(True)or sooner (CPU-time) withp.stepSimulation(). One other solution to set real-time is:
import time

for _ in vary(240):   #240 timestep generally utilized in videogame growth
    p.stepSimulation() #add a physics step (CPU velocity = 0.1 second)
    time.sleep(1/240)  #decelerate to real-time (240 steps × 1/240 second sleep = 1 second)
Robotic
At the moment, our 3D atmosphere is product of somewhat object (tiny pink dice), and a desk (huge dice) mounted to the bottom (airplane). I shall add a robotic arm with the duty of choosing up the smaller object and placing it on the desk.
PyBullet has a default robotic arm modeled after the Franka Panda Robotic.
robo = p.loadURDF("franka_panda/panda.urdf",
                   basePosition=[1,0,0.1], useFixedBase=True)
The very first thing to do is to investigate the hyperlinks (the strong components) and joints (connections between two inflexible components) of the robotic. For this goal, you possibly can simply use p.DIRECT as there isn’t a want for the graphic interface.
import pybullet as p
import pybullet_data

## setup
p.join(p.DIRECT)
p.resetSimulation()
p.setGravity(gravX=0, gravY=0, gravZ=-9.8)
p.setAdditionalSearchPath(path=pybullet_data.getDataPath())

## load URDF
robo = p.loadURDF("franka_panda/panda.urdf",
                  basePosition=[1,0,0.1], useFixedBase=True)

## joints
dic_info = {
    0:"joint Index",  #begins at 0
    1:"joint Title",
    2:"joint Sort",  #0=revolute (rotational), 1=prismatic (sliding), 4=mounted
    3:"state vectorIndex",
    4:"velocity vectorIndex",
    5:"flags",  #nvm at all times 0
    6:"joint Damping",
    7:"joint Friction",  #coefficient
    8:"joint lowerLimit",  #min angle
    9:"joint upperLimit",  #max angle
    10:"joint maxForce",  #max power allowed
    11:"joint maxVelocity",  #max velocity
    12:"hyperlink Title",  #youngster hyperlink related to this joint
    13:"joint Axis",
    14:"dad or mum FramePos",  #place
    15:"dad or mum FrameOrn",  #orientation
    16:"dad or mum Index"  #−1 = base
}
for i in vary(p.getNumJoints(bodyUniqueId=robo)):
    joint_info = p.getJointInfo(bodyUniqueId=robo, jointIndex=i)
    print(f"--- JOINT {i} ---")
    print({dic_info[k]:joint_info[k] for ok in dic_info.keys()})

## hyperlinks
for i in vary(p.getNumJoints(robo)):
    link_name = p.getJointInfo(robo, i)[12].decode('utf-8')  #discipline 12="hyperlink Title"
    dyn = p.getDynamicsInfo(robo, i)
    pos, orn, *_ = p.getLinkState(robo, i)
    dic_info = {"Mass":dyn[0], "Friction":dyn[1], "Place":pos, "Orientation":orn}
    print(f"--- LINK {i}: {link_name} ---")
    print(dic_info)
Each robotic has a “base“, the foundation a part of its physique that connects all the pieces (like our skeleton backbone). Trying on the output of the code above, we all know that the robotic arm has 12 joints and 12 hyperlinks. They’re related like this:

Motion Management
As a way to make a robotic do one thing, it’s a must to transfer its joints. There are 3 principal kinds of management, that are all functions of Newton’s legal guidelines of movement:
- Place management: principally, you inform the robotic “go right here”. Technically, you set a goal place, after which apply power to regularly transfer the joint from its present place towards the goal. Because it will get nearer, the utilized power decreases to keep away from overshooting and ultimately balances completely in opposition to resistive forces (i.e. friction, gravity) to carry the joint regular in place.
- Velocity management: principally, you inform the robotic “transfer at this velocity”. Technically, you set a goal velocity, and apply power to regularly convey the rate from zero to the goal, then preserve it by balancing utilized power and resistive forces (i.e. friction, gravity).
- Power/Torque management: principally, you “push the robotic and see what occurs”. Technically, you straight set the power utilized on the joint, and the ensuing movement relies upon purely on the thing’s mass, inertia, and the atmosphere. As a facet word, in physics, the phrase “power” is used for linear movement (push/pull), whereas “torque” signifies rotational movement (twist/flip).
We will use p.setJointMotorControl2() to maneuver a single joint, and p.setJointMotorControlArray() to use power to a number of joints on the similar time. As an example, I shall carry out place management by giving a random goal for every arm joint.
## setup
p.join(p.GUI)
p.resetSimulation()
p.setGravity(gravX=0, gravY=0, gravZ=-9.8)
p.setAdditionalSearchPath(path=pybullet_data.getDataPath())

## load URDF
airplane = p.loadURDF("airplane.urdf")
dice = p.loadURDF("dice.urdf", basePosition=[0,0,0.1], globalScaling=0.5, useFixedBase=True)
robo = p.loadURDF("franka_panda/panda.urdf", basePosition=[1,0,0.1], useFixedBase=True)
obj = p.loadURDF("cube_small.urdf", basePosition=[1,1,0.1], globalScaling=1.5)
p.changeVisualShape(objectUniqueId=obj, linkIndex=-1, rgbaColor=[1,0,0,1]) #pink

## transfer arm
joints = [0,1,2,3,4,5,6]
target_positions = [1,1,1,1,1,1,1] #<--random numbers
p.setJointMotorControlArray(bodyUniqueId=robo, jointIndices=joints,
                            controlMode=p.POSITION_CONTROL,
                            targetPositions=target_positions,
                            forces=[50]*len(joints))
for _ in vary(240*3):
    p.stepSimulation()
    time.sleep(1/240)
The true query is, “what’s the best goal place for every joint?” The reply is Inverse Kinematics, the mathematical means of calculating the parameters wanted to position a robotic in a given place and orientation relative to a place to begin. Every joint defines an angle, and also you don’t wish to guess a number of joint angles by hand. So, we’ll ask PyBullet to determine the goal positions within the Cartesian house with p.calculateInverseKinematics().
obj_position, _ = p.getBasePositionAndOrientation(obj)
obj_position = checklist(obj_position)

target_positions = p.calculateInverseKinematics(
    bodyUniqueId=robo,
    endEffectorLinkIndex=11, #grasp-target hyperlink
    targetPosition=[obj_position[0], obj_position[1], obj_position[2]+0.25], #25cm above object
    targetOrientation=p.getQuaternionFromEuler([0,-3.14,0]) #[roll,pitch,yaw]=[0,-π,0] -> hand pointing down
)

arm_joints = [0,1,2,3,4,5,6]
p.setJointMotorControlArray(bodyUniqueId=robo, controlMode=p.POSITION_CONTROL,
                            jointIndices=arm_joints,
                            targetPositions=target_positions[:len(arm_joints)],
                            forces=[50]*len(arm_joints))
Please word that I used p.getQuaternionFromEuler() to convert the 3D angles (simple for people to grasp) into 4D, as “quaternions” are simpler for physics engines to compute. If you wish to get technical, in a quaternion (x, y, z, w), the primary three elements describe the axis of rotation, whereas the fourth dimension encodes the quantity of rotation (cos/sin).
The code above instructions the robotic to maneuver its hand to a particular place above an object utilizing Inverse Kinematics. We seize the place the little pink dice is sitting on the planet with p.getBasePositionAndOrientation(), and we use the knowledge to calculate the goal place for the joints.
Work together with Objects
The robotic arm has a hand (“gripper”), so it may be opened and closed to seize objects. From the earlier evaluation, we all know that the “fingers” can transfer inside (0-0.04). So, you possibly can set the goal place because the decrease restrict (hand closed) or the higher restrict (hand open).

Furthermore, I wish to be sure that the arm holds the little pink dice whereas shifting round. You need to use p.createConstraint() to make a non permanent physics bond between the robotic’s gripper and the thing, so that it’ll transfer along with the robotic hand. In the actual world, the gripper would apply power by means of friction and make contact with to squeeze the thing so it doesn’t fall. However, since PyBullet is a quite simple simulator, I’ll simply take this shortcut.
## shut hand
p.setJointMotorControl2(bodyUniqueId=robo, controlMode=p.POSITION_CONTROL,
                        jointIndex=9, #finger_joint1
                        targetPosition=0, #decrease restrict for finger_joint1
                        power=power)
p.setJointMotorControl2(bodyUniqueId=robo, controlMode=p.POSITION_CONTROL,
                        jointIndex=10, #finger_joint2
                        targetPosition=0, #decrease restrict for finger_joint2
                        power=power)

## maintain the thing
constraint = p.createConstraint(
    parentBodyUniqueId=robo,
    parentLinkIndex=11,
    childBodyUniqueId=obj,
    childLinkIndex=-1,
    jointType=p.JOINT_FIXED,
    jointAxis=[0,0,0],
    parentFramePosition=[0,0,0],
    childFramePosition=[0,0,0,1]
)
After that, we are able to transfer the arm towards the desk, utilizing the identical technique as earlier than: Inverse Kinematics -> goal place -> place management.

Lastly, when the robotic reaches the goal place within the Cartesian house, we are able to open the hand and launch the constraint between the thing and the arm.
## shut hand
p.setJointMotorControl2(bodyUniqueId=robo, controlMode=p.POSITION_CONTROL,
                        jointIndex=9, #finger_joint1
                        targetPosition=0.04, #higher restrict for finger_joint1
                        power=power)
p.setJointMotorControl2(bodyUniqueId=robo, controlMode=p.POSITION_CONTROL,
                        jointIndex=10, #finger_joint2
                        targetPosition=0.04, #higher restrict for finger_joint2
                        power=power)

## drop the obj
p.removeConstraint(constraint)
Full Guide Management
In PyBullet, it’s worthwhile to render the simulation for each motion the robotic takes. Due to this fact, it’s handy to have a utils operate that may velocity up (i.e. sec=0.1) or decelerate (i.e. sec=2) the real-time (sec=1).
import pybullet as p
import time

def render(sec=1):
    for _ in vary(int(240*sec)):
        p.stepSimulation()
        time.sleep(1/240)
Right here’s the total code for the simulation we have now performed on this article.
import pybullet_data

## setup
p.join(p.GUI)
p.resetSimulation()
p.setGravity(gravX=0, gravY=0, gravZ=-9.8)
p.setAdditionalSearchPath(path=pybullet_data.getDataPath())

airplane = p.loadURDF("airplane.urdf")
dice = p.loadURDF("dice.urdf", basePosition=[0,0,0.1], globalScaling=0.5, useFixedBase=True)
robo = p.loadURDF("franka_panda/panda.urdf", basePosition=[1,0,0.1], globalScaling=1.3, useFixedBase=True)
obj = p.loadURDF("cube_small.urdf", basePosition=[1,1,0.1], globalScaling=1.5)
p.changeVisualShape(objectUniqueId=obj, linkIndex=-1, rgbaColor=[1,0,0,1])

render(0.1)
power = 100


## open hand
print("### open hand ###")
p.setJointMotorControl2(bodyUniqueId=robo, controlMode=p.POSITION_CONTROL,
                        jointIndex=9, #finger_joint1
                        targetPosition=0.04, #higher restrict for finger_joint1
                        power=power)
p.setJointMotorControl2(bodyUniqueId=robo, controlMode=p.POSITION_CONTROL,
                        jointIndex=10, #finger_joint2
                        targetPosition=0.04, #higher restrict for finger_joint2
                        power=power)
render(0.1)
print(" ")


## transfer arm
print("### transfer arm ### ")
obj_position, _ = p.getBasePositionAndOrientation(obj)
obj_position = checklist(obj_position)

target_positions = p.calculateInverseKinematics(
    bodyUniqueId=robo,
    endEffectorLinkIndex=11, #grasp-target hyperlink
    targetPosition=[obj_position[0], obj_position[1], obj_position[2]+0.25], #25cm above object
    targetOrientation=p.getQuaternionFromEuler([0,-3.14,0]) #[roll,pitch,yaw]=[0,-π,0] -> hand pointing down
)
print("goal place:", target_positions)

arm_joints = [0,1,2,3,4,5,6]
p.setJointMotorControlArray(bodyUniqueId=robo, controlMode=p.POSITION_CONTROL,
                            jointIndices=arm_joints,
                            targetPositions=target_positions[:len(arm_joints)],
                            forces=[force/3]*len(arm_joints))

render(0.5)
print(" ")


## shut hand
print("### shut hand ###")
p.setJointMotorControl2(bodyUniqueId=robo, controlMode=p.POSITION_CONTROL,
                        jointIndex=9, #finger_joint1
                        targetPosition=0, #decrease restrict for finger_joint1
                        power=power)
p.setJointMotorControl2(bodyUniqueId=robo, controlMode=p.POSITION_CONTROL,
                        jointIndex=10, #finger_joint2
                        targetPosition=0, #decrease restrict for finger_joint2
                        power=power)
render(0.1)
print(" ")


## maintain the thing
print("### maintain the thing ###")
constraint = p.createConstraint(
    parentBodyUniqueId=robo,
    parentLinkIndex=11,
    childBodyUniqueId=obj,
    childLinkIndex=-1,
    jointType=p.JOINT_FIXED,
    jointAxis=[0,0,0],
    parentFramePosition=[0,0,0],
    childFramePosition=[0,0,0,1]
)
render(0.1)
print(" ")


## transfer in direction of the desk
print("### transfer in direction of the desk ###")
cube_position, _ = p.getBasePositionAndOrientation(dice)
cube_position = checklist(cube_position)

target_positions = p.calculateInverseKinematics(
    bodyUniqueId=robo,
    endEffectorLinkIndex=11, #grasp-target hyperlink
    targetPosition=[cube_position[0], cube_position[1], cube_position[2]+0.80], #80cm above the desk
    targetOrientation=p.getQuaternionFromEuler([0,-3.14,0]) #[roll,pitch,yaw]=[0,-π,0] -> hand pointing down
)
print("goal place:", target_positions)

arm_joints = [0,1,2,3,4,5,6]
p.setJointMotorControlArray(bodyUniqueId=robo, controlMode=p.POSITION_CONTROL,
                            jointIndices=arm_joints,
                            targetPositions=target_positions[:len(arm_joints)],
                            forces=[force*3]*len(arm_joints))
render()
print(" ")


## open hand and drop the obj
print("### open hand and drop the obj ###")
p.setJointMotorControl2(bodyUniqueId=robo, controlMode=p.POSITION_CONTROL,
                        jointIndex=9, #finger_joint1
                        targetPosition=0.04, #higher restrict for finger_joint1
                        power=power)
p.setJointMotorControl2(bodyUniqueId=robo, controlMode=p.POSITION_CONTROL,
                        jointIndex=10, #finger_joint2
                        targetPosition=0.04, #higher restrict for finger_joint2
                        power=power)
p.removeConstraint(constraint)
render()
Conclusion
This text has been a tutorial on manually management a robotic arm. We realized about motion management, Inverse Kinematics, grabbing and shifting objects. New tutorials with extra superior robots will come.
Full code for this text: GitHub
I hope you loved it! Be at liberty to contact me for questions and suggestions, or simply to share your fascinating initiatives.
👉 Let’s Join 👈

(All photos are by the writer until in any other case famous)


